-
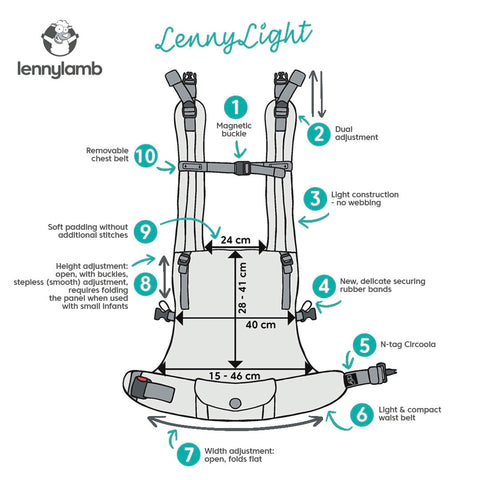
Less is more- Fewer straps, buckles, and adjustments make for simple, easy, comfortable babywearing
-
Never lose important info- Scan the Circoola symbol on your waistband to get access to tutorials and information about your carrier, including its unique serial number
- Easy to store- Comes with its very own sewn-on mesh carrying bag. Protect your carrier no matter where you store it
-
Tighten with ease with your child on your front, back, or hip using the 2-way under-arm strap adjusters
-
Get out the door fast- Store your phone, keys, and more in the magnetic waistband pocket
-
Carry your baby your way. Try a front carry for a sleepy kiddo, or put them on your hip or back to see the world! Don't forget to try the cross-strap option, too
-
Grows with your baby- Simple height and width panel adjustments let you use one carrier for years... If you can resist getting more colors and styles to play with!
Why would I want a soft structured carrier?
-
Don’t like long pieces of fabric hanging down
-
Want something super quick
-
Want something easy to learn and easy to pass between caregivers
-
Want something familiar and don’t want to learn how to tie
-
Need customization of fit due to injuries or sensitivities. A long woven wrap would be a better choice for you
First, adjust your carrier's panel height and width.
Adjust the height by using the pull tabs on the panel.
Adjust the width by using the Velcro adjuster inside the waistband.
Once you're adjusted, put your baby in the carrier
Front Carry:
- Buckle the waistband with the velcro adjustment side facing you and the panel in front. Be sure to put the buckle through the elastic safety band before closing. This provides extra fall protection for your child.
- Place your child into the panel, facing you. Center them in the panel, then lift the panel up over your child's back. To get the best fit, try to reduce slack in the panel by lifting the straps high in the air and gently bouncing your child into the panel. You want them to sit out in the panel, not on the waistband itself.
- Method A - Put your arms through the ruck straps. Reach behind you to fasten the chest clip. The magnetic clip should fasten easily! Experiment with how loose you leave the straps, including the chest clip, before putting your child in the carrier, to see what's most comfortable for you. When buckled, use the webbing to tighten as is comfortable.
- Method B - Alternate H method, if you can't reach behind your back to clip the chest clip: Prior to putting your child in the carrier, unclip the arm straps so they hang loose, and buckle the chest clip. When your child is in the panel, lift the straps over your head. Your head will go through the top of the "H," above the chest buckle, which you've already clasped. Once the straps are behind you, buckle each arm strap on its respective side. Don't forget to put the buckle through the elastic safety band before buckling
- Method C - Cross-strap method: Prior to putting your child in the carrier, unclip the arm straps so they hang loose, and leave the chest clip unbuckled. With your child in the panel, lift the panel up over their back. One side at a time, lift the arm strap into the air above you, then pull firmly straight down your back. The reduces slack in the panel. Then, cross the strap behind your back to the opposite side and buckle the arm strap in. Do the same for the other strap. Don't forget to put the buckle through the safety elastic before buckling. In this method, you don't need to clip the chest clip- you can remove it completely if you'd like!
- Use the 2-way adjusters to tighten as needed
- Gently move your child's bottom out into the panel, instead of sitting on the waistband. Hold the waistband where the pocket is, and try to keep the pocket straight up and down. Tighten the waistband while holding here. It's easier to tighten if you are lifting your child's weight off of the waistband. Gentle bouncing can also help
- Check to make sure the waistband strap is parallel to the floor. Gently adjust waistband, child in panel, and anything else as needed
Back Carry:
For typically developing babies, you can back or hip carry in the LennyLight SSC when your child has sufficient head and trunk control, usually around 4-6months old. Some sides of readiness include being able to tripod sit or when you're naturally placing your child on your hip in daily life.
Method 1:
Crossed arms
-Cross the arm of the shoulder you will bring your child over underneath the other arm. Use your hands to pin the top edge of the panel to your child in the position you want the carrier to be in when baby is up. So, if you want your child arms in, position the top of the panel and hold onto it at the top of your child's shoulder. For arms out, grab your child under the arms with the panel.
-Move your body into your child (as opposed to twisting your child to you). This will allow you to get your child up into the carrier without twisting the fabric.
Once your child is up:
-Hold tightly to the top of the carrier, pinning the straps with your chin or biting with your teeth. This takes practice!
-Pull the slack down with the bottom of the panel/waistband. Pulling it out can help! Stand up straight and allow gravity to help you. Buckle the waistband, making sure to use the elastic safety band
-Clip the chest clip
-Tighten the webbing as needed
-Gently move your child's bottom out into the panel, instead of sitting on the waistband. Hold the waistband where the pocket is, and try to keep the pocket straight up and down. Tighten the waistband while holding here. It's easier to tighten if you are lifting your child's weight off of the waistband. Gentle bouncing can also help
-Check to make sure the waistband strap is parallel to the floor. Gently adjust waistband, child in panel, and anything else as needed
Method 2:
Hip Scoot
-Buckle the waistband, making sure to use the elastic safety band. Position the panel on your hip on the side you would naturally carry your child. Typically this is slightly more forward on the hip
-Place your child in the panel. Center them in the panel
-When you're satisfied with you child's seat, use the opposite arm from where your child is sitting and put your arm through the arm strap. This is easier if the straps are a little looser prior to starting.
-Using momentum and the strap already on your opposite shoulder, scoot your child behind you. Use your other arm to support your child in the panel as they scoot
-Put your arm through the other strap. Clip the chest clip and adjust your child's position as needed
-Tighten the webbing as needed
-Gently move your child's bottom out into the panel, instead of sitting on the waistband. Hold the waistband where the pocket is, and try to keep the pocket straight up and down. Tighten the waistband while holding here. It's easier to tighten if you are lifting your child's weight off of the waistband. Gentle bouncing can also help
-Check to make sure the waistband strap is parallel to the floor. Gently adjust waistband, child in panel, and anything else as needed
Method 3:
Little Helper
In this method, your child climbs onto your back to help! This method works for older babies.
-Buckle the waistband, putting the buckle through the safety elastic before buckling. Position the panel behind you
-Allow your child to climb onto your back. You can be silly with it! Big kids love to be helpers. Have them hang on at your neck
-Lift the panel up over your child's back, lifting high to remove slack. Let them settle in to the panel
-Put your arms through the straps and clip the chest clip. Adjust your child's position as needed
-Tighten the webbing as needed
-Gently move your child's bottom out into the panel, instead of sitting on the waistband. Hold the waistband where the pocket is, and try to keep the pocket straight up and down. Tighten the waistband while holding here. It's easier to tighten if you are lifting your child's weight off of the waistband. Gentle bouncing can also help
-Check to make sure the waistband strap is parallel to the floor. Gently adjust waistband, child in panel, and anything else as needed

Margin of error + or - 1.25" / 3cm
Carrier dimensions:
Width at panel top edge, between shoulder straps: 9.5" / 24cm
Height at panel center: adjusts from 11" - 16" / 28 - 41cm
Width at base of panel: adjusts from 6" - 18" / 15 - 46cm
*Not pictured*
Shoulder straps: adjust from 17.75" - 43.75" / 45 - 111 cm
Waist belt: adjusts from 23.5" - 56.5" / 60 - 144 cm as a standard (can be ordered in longer lengths by emailing contact@mama-roo.com)
Plus size caregivers: Our baby backpack carriers fit most caregivers up to t-shirt size 4x/5x as a standard. The minimum length for these waistbands is 50" as a standard, with many measuring longer. If you need a longer length waistband, email us at contact@mama-roo.com with the length you need. We will special order your desired waist strap length at no extra charge!
Typical age range: Newborn - 3yrs old+
Typical child's clothing sizes: Newborn - 3T/4T
Minimum rated weight: 7.5lbs / 3.5kg
Maximum rated weight: 44lbs / 20kg
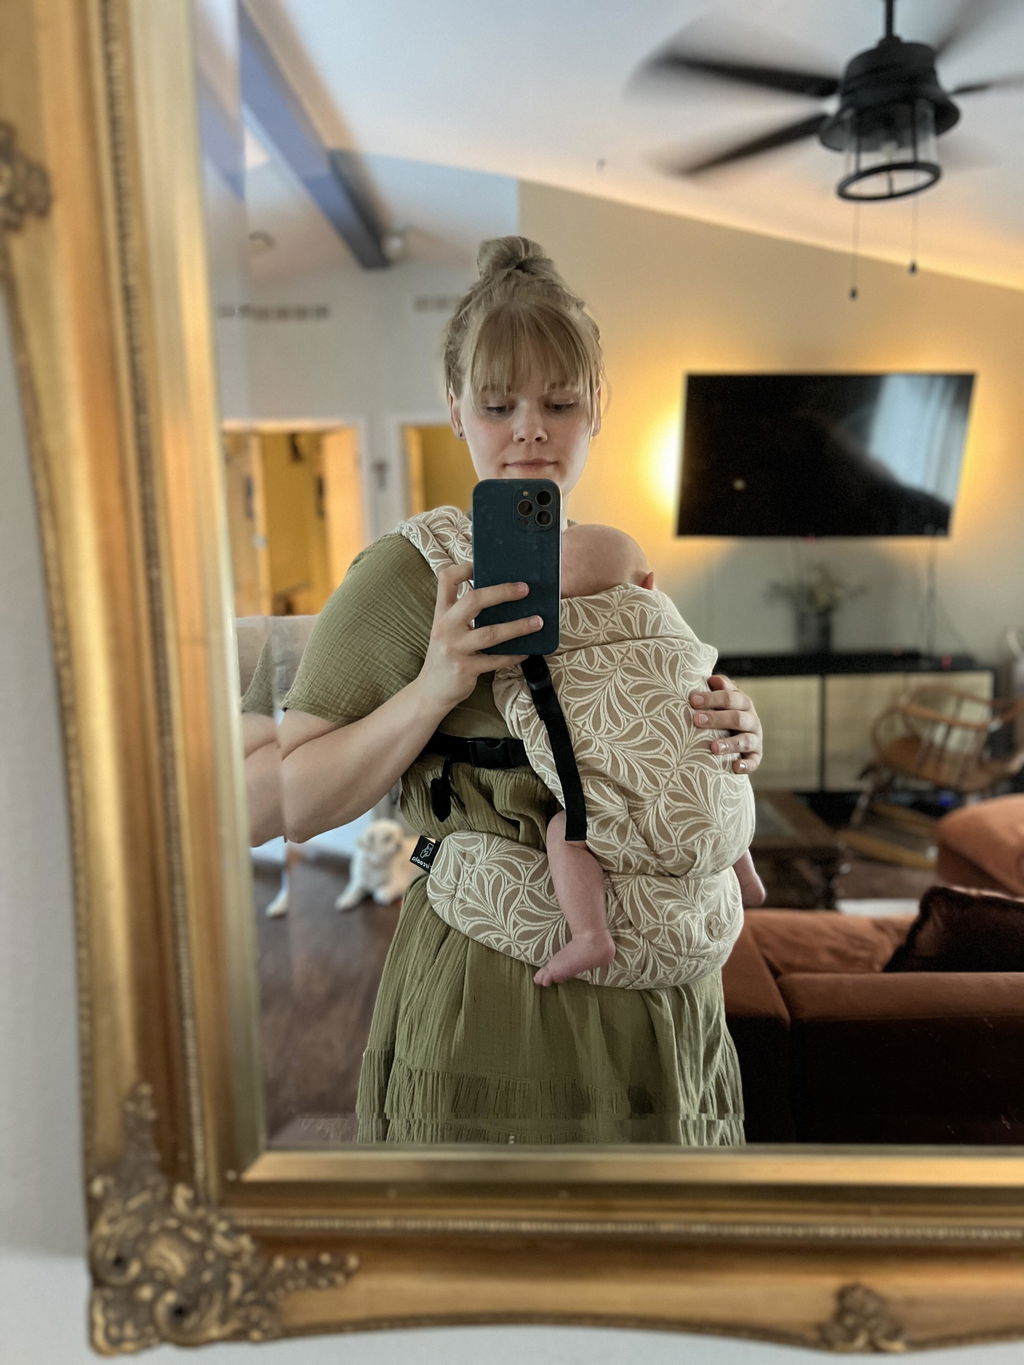
Airglow is a lightweight fabric. It’s great for new baby wearers and young babies. Airglow is soft and radiant. The ombre glows and is so helpful for learning!
Design Description - Airglow is perfection. A gorgeous gradient that starts with a deep blue, then teal to green finally to grey. Easy to learn with and absolutely stunning. You’ll love Airglow’s neutral tones and rich hues. This design is ready for anything!
Type of weave - Broken Twill
Material Weight - 200 gsm
Material Type - 100% Cotton
Safety certificates
Complies with PD CEN/TR 16512:2015 and ASTM F2236 - 16a
Wrap conversions start out as long woven baby wraps. That fabric is then cut and sewn into a different type of baby carrier. This could be a ring sling, onbuhimo, meh dai, or SSC. Why does it matter?
Long woven wraps are made to carry babies.They're woven in a way that's soft and supportive. They're also breathable. Many wraps are made of easy-care materials.
Designs are woven into the fabric. No screen printing that fades. It's the real deal, straight from the loom!
Carriers that aren't made of long woven wraps are often more stiff. SSC carriers are commonly made with canvas or even plastic. These materials may be durable, but they aren't as comfortable or flexible. There isn't much airflow through the fabric, which can lead to overheating. Patterns are pressed onto the fabric as opposed to being a part of it.
Wrap conversion carriers are as strong and long-lasting as non-wrap conversion carriers. But, they have many other benefits! For the ultimate in comfort for you and your child, a wrap conversion baby carrier is the way to go.
Exchanges:
Was it not quite right? No problem! We’ll provide you a prepaid return label. Send your order back within 30 calendar days of your order being shipped to you.
Once we receive your item, we’ll issue you a gift card. You can then use your gift card on the item of your choice!
Returns:
Email us if you need a return. Let us know who you are and why you’re returning. Returns must be back to us within 30 calendar days of your order being shipped to you. Your refund will be issued to you for the product you returned minus standard shipping costs.
Read the whole return policy here
If you need your order by a specific date, let us know! Please leave the date you need it in the order notes during checkout.
Shipping is free on orders over $200 to US addresses.
Shipping is a flat rate of $12.99 for orders less than $200.
Shipping rates to Canada are calculated based on address.
Most items ship within 2-3 business days. We start processing immediately and cannot modify or cancel orders once they are placed.
We ship orders on Tuesdays and Thursdays from North Carolina.
Items marked as a pre-order are expected to ship within 4-6 weeks. Please reach out before ordering with any questions.
Need express shipping? Message us via chat or email us as contact@mama-roo.com, and we will do what we can to accommodate you.
You can find the whole shipping policy here
LennyLight - Airglow
- Unit price
- / per
At Mama & Roo's safety is our first priority
our guarantee
Secure Payment
Certified safe to US and EU standards
Vegan
Ways to Carry
Front Carry
Back Carry
Hip Carry
Adding product to your cart
-
Less is more- Fewer straps, buckles, and adjustments make for simple, easy, comfortable babywearing
-
Never lose important info- Scan the Circoola symbol on your waistband to get access to tutorials and information about your carrier, including its unique serial number
- Easy to store- Comes with its very own sewn-on mesh carrying bag. Protect your carrier no matter where you store it
-
Tighten with ease with your child on your front, back, or hip using the 2-way under-arm strap adjusters
-
Get out the door fast- Store your phone, keys, and more in the magnetic waistband pocket
-
Carry your baby your way. Try a front carry for a sleepy kiddo, or put them on your hip or back to see the world! Don't forget to try the cross-strap option, too
-
Grows with your baby- Simple height and width panel adjustments let you use one carrier for years... If you can resist getting more colors and styles to play with!
Why would I want a soft structured carrier?
-
Don’t like long pieces of fabric hanging down
-
Want something super quick
-
Want something easy to learn and easy to pass between caregivers
-
Want something familiar and don’t want to learn how to tie
-
Need customization of fit due to injuries or sensitivities. A long woven wrap would be a better choice for you
First, adjust your carrier's panel height and width.
Adjust the height by using the pull tabs on the panel.
Adjust the width by using the Velcro adjuster inside the waistband.
Once you're adjusted, put your baby in the carrier
Front Carry:
- Buckle the waistband with the velcro adjustment side facing you and the panel in front. Be sure to put the buckle through the elastic safety band before closing. This provides extra fall protection for your child.
- Place your child into the panel, facing you. Center them in the panel, then lift the panel up over your child's back. To get the best fit, try to reduce slack in the panel by lifting the straps high in the air and gently bouncing your child into the panel. You want them to sit out in the panel, not on the waistband itself.
- Method A - Put your arms through the ruck straps. Reach behind you to fasten the chest clip. The magnetic clip should fasten easily! Experiment with how loose you leave the straps, including the chest clip, before putting your child in the carrier, to see what's most comfortable for you. When buckled, use the webbing to tighten as is comfortable.
- Method B - Alternate H method, if you can't reach behind your back to clip the chest clip: Prior to putting your child in the carrier, unclip the arm straps so they hang loose, and buckle the chest clip. When your child is in the panel, lift the straps over your head. Your head will go through the top of the "H," above the chest buckle, which you've already clasped. Once the straps are behind you, buckle each arm strap on its respective side. Don't forget to put the buckle through the elastic safety band before buckling
- Method C - Cross-strap method: Prior to putting your child in the carrier, unclip the arm straps so they hang loose, and leave the chest clip unbuckled. With your child in the panel, lift the panel up over their back. One side at a time, lift the arm strap into the air above you, then pull firmly straight down your back. The reduces slack in the panel. Then, cross the strap behind your back to the opposite side and buckle the arm strap in. Do the same for the other strap. Don't forget to put the buckle through the safety elastic before buckling. In this method, you don't need to clip the chest clip- you can remove it completely if you'd like!
- Use the 2-way adjusters to tighten as needed
- Gently move your child's bottom out into the panel, instead of sitting on the waistband. Hold the waistband where the pocket is, and try to keep the pocket straight up and down. Tighten the waistband while holding here. It's easier to tighten if you are lifting your child's weight off of the waistband. Gentle bouncing can also help
- Check to make sure the waistband strap is parallel to the floor. Gently adjust waistband, child in panel, and anything else as needed
Back Carry:
For typically developing babies, you can back or hip carry in the LennyLight SSC when your child has sufficient head and trunk control, usually around 4-6months old. Some sides of readiness include being able to tripod sit or when you're naturally placing your child on your hip in daily life.
Method 1:
Crossed arms
-Cross the arm of the shoulder you will bring your child over underneath the other arm. Use your hands to pin the top edge of the panel to your child in the position you want the carrier to be in when baby is up. So, if you want your child arms in, position the top of the panel and hold onto it at the top of your child's shoulder. For arms out, grab your child under the arms with the panel.
-Move your body into your child (as opposed to twisting your child to you). This will allow you to get your child up into the carrier without twisting the fabric.
Once your child is up:
-Hold tightly to the top of the carrier, pinning the straps with your chin or biting with your teeth. This takes practice!
-Pull the slack down with the bottom of the panel/waistband. Pulling it out can help! Stand up straight and allow gravity to help you. Buckle the waistband, making sure to use the elastic safety band
-Clip the chest clip
-Tighten the webbing as needed
-Gently move your child's bottom out into the panel, instead of sitting on the waistband. Hold the waistband where the pocket is, and try to keep the pocket straight up and down. Tighten the waistband while holding here. It's easier to tighten if you are lifting your child's weight off of the waistband. Gentle bouncing can also help
-Check to make sure the waistband strap is parallel to the floor. Gently adjust waistband, child in panel, and anything else as needed
Method 2:
Hip Scoot
-Buckle the waistband, making sure to use the elastic safety band. Position the panel on your hip on the side you would naturally carry your child. Typically this is slightly more forward on the hip
-Place your child in the panel. Center them in the panel
-When you're satisfied with you child's seat, use the opposite arm from where your child is sitting and put your arm through the arm strap. This is easier if the straps are a little looser prior to starting.
-Using momentum and the strap already on your opposite shoulder, scoot your child behind you. Use your other arm to support your child in the panel as they scoot
-Put your arm through the other strap. Clip the chest clip and adjust your child's position as needed
-Tighten the webbing as needed
-Gently move your child's bottom out into the panel, instead of sitting on the waistband. Hold the waistband where the pocket is, and try to keep the pocket straight up and down. Tighten the waistband while holding here. It's easier to tighten if you are lifting your child's weight off of the waistband. Gentle bouncing can also help
-Check to make sure the waistband strap is parallel to the floor. Gently adjust waistband, child in panel, and anything else as needed
Method 3:
Little Helper
In this method, your child climbs onto your back to help! This method works for older babies.
-Buckle the waistband, putting the buckle through the safety elastic before buckling. Position the panel behind you
-Allow your child to climb onto your back. You can be silly with it! Big kids love to be helpers. Have them hang on at your neck
-Lift the panel up over your child's back, lifting high to remove slack. Let them settle in to the panel
-Put your arms through the straps and clip the chest clip. Adjust your child's position as needed
-Tighten the webbing as needed
-Gently move your child's bottom out into the panel, instead of sitting on the waistband. Hold the waistband where the pocket is, and try to keep the pocket straight up and down. Tighten the waistband while holding here. It's easier to tighten if you are lifting your child's weight off of the waistband. Gentle bouncing can also help
-Check to make sure the waistband strap is parallel to the floor. Gently adjust waistband, child in panel, and anything else as needed

Margin of error + or - 1.25" / 3cm
Carrier dimensions:
Width at panel top edge, between shoulder straps: 9.5" / 24cm
Height at panel center: adjusts from 11" - 16" / 28 - 41cm
Width at base of panel: adjusts from 6" - 18" / 15 - 46cm
*Not pictured*
Shoulder straps: adjust from 17.75" - 43.75" / 45 - 111 cm
Waist belt: adjusts from 23.5" - 56.5" / 60 - 144 cm as a standard (can be ordered in longer lengths by emailing contact@mama-roo.com)
Plus size caregivers: Our baby backpack carriers fit most caregivers up to t-shirt size 4x/5x as a standard. The minimum length for these waistbands is 50" as a standard, with many measuring longer. If you need a longer length waistband, email us at contact@mama-roo.com with the length you need. We will special order your desired waist strap length at no extra charge!
Typical age range: Newborn - 3yrs old+
Typical child's clothing sizes: Newborn - 3T/4T
Minimum rated weight: 7.5lbs / 3.5kg
Maximum rated weight: 44lbs / 20kg
Airglow is a lightweight fabric. It’s great for new baby wearers and young babies. Airglow is soft and radiant. The ombre glows and is so helpful for learning!
Design Description - Airglow is perfection. A gorgeous gradient that starts with a deep blue, then teal to green finally to grey. Easy to learn with and absolutely stunning. You’ll love Airglow’s neutral tones and rich hues. This design is ready for anything!
Type of weave - Broken Twill
Material Weight - 200 gsm
Material Type - 100% Cotton
Safety certificates
Complies with PD CEN/TR 16512:2015 and ASTM F2236 - 16a
Wrap conversions start out as long woven baby wraps. That fabric is then cut and sewn into a different type of baby carrier. This could be a ring sling, onbuhimo, meh dai, or SSC. Why does it matter?
Long woven wraps are made to carry babies.They're woven in a way that's soft and supportive. They're also breathable. Many wraps are made of easy-care materials.
Designs are woven into the fabric. No screen printing that fades. It's the real deal, straight from the loom!
Carriers that aren't made of long woven wraps are often more stiff. SSC carriers are commonly made with canvas or even plastic. These materials may be durable, but they aren't as comfortable or flexible. There isn't much airflow through the fabric, which can lead to overheating. Patterns are pressed onto the fabric as opposed to being a part of it.
Wrap conversion carriers are as strong and long-lasting as non-wrap conversion carriers. But, they have many other benefits! For the ultimate in comfort for you and your child, a wrap conversion baby carrier is the way to go.
Exchanges:
Was it not quite right? No problem! We’ll provide you a prepaid return label. Send your order back within 30 calendar days of your order being shipped to you.
Once we receive your item, we’ll issue you a gift card. You can then use your gift card on the item of your choice!
Returns:
Email us if you need a return. Let us know who you are and why you’re returning. Returns must be back to us within 30 calendar days of your order being shipped to you. Your refund will be issued to you for the product you returned minus standard shipping costs.
Read the whole return policy here
If you need your order by a specific date, let us know! Please leave the date you need it in the order notes during checkout.
Shipping is free on orders over $200 to US addresses.
Shipping is a flat rate of $12.99 for orders less than $200.
Shipping rates to Canada are calculated based on address.
Most items ship within 2-3 business days. We start processing immediately and cannot modify or cancel orders once they are placed.
We ship orders on Tuesdays and Thursdays from North Carolina.
Items marked as a pre-order are expected to ship within 4-6 weeks. Please reach out before ordering with any questions.
Need express shipping? Message us via chat or email us as contact@mama-roo.com, and we will do what we can to accommodate you.
You can find the whole shipping policy here
Ways to use
Front Carry
Carry your baby in front of you facing in
Cross straps
Crossing the straps can help you be more comforable!
Back Carry
Carry your child on your back
Hip Carry
Cross the straps and allow your kiddo to be on your hip
Added Features
Adjustable panel
The adjustable panel allows for you to use this carrier for years with your child
2-Way tightening
The shoulder straps can be tightened by pulling one strap towards you, or pulling the other side of the strap away from you
newborn to toddler
Carry kids for longer than ever, with this carrier from newborn to toddler. Rated 7.5lbs to 44lbs!
A convenient pocket to hold your keys, phone, and other small goodies you may need while out walking with your child
Removable chest clip
The chest clip comes off completely so you're able to get it out of the way when you aren't using it
Magnetic Chest Clip
Going solo? No problem! Quickly and easily clip your chest clip alone
Super light
Designed for minimal bulk and ultimate comfort
Circoola
A scannable tag to tell you all about the fabric
lenny-Light
Newborn through Toddler ssc
Check out the Lenny Light to get a SSC for your little babe!
Lenny Preschooler
Preschool and beyond
Use this carrier to carry your big babe! Check out the other styles
Tutorial Video
Watch how easy it is to size the LennyLight for your child
Tutorial Video
Watch how easy it is to size the LennyLight for your child
Tutorial Video
Watch to see how there are different ways to use the LennyLight!
Tutorial Video
Watch to see how there are different ways to use the LennyLight!
Accessories
- Small
- Medium
- Large
- Extra Large
Hip Carry
Watch as Amanda shows you how to do a hip carry with a SSC style carrier!
From the Journal
Why Mama & Roo's?
A short list of reasons to love Mama & Roo's Babywearing Baby Carriers! What makes us so special? Here are just a few ways... Others: To get help with your...
Updates Aug 28 - Tariffs, Fall, and More
It's all anyone's talking about... 💫 Tariffs! 💫 Watch the video above as we talk through tariff updates, fall plans, and more at Mama & Roo's Okay, maybe it's...
Quick tip: How to be more comfortable when babywearing
Hey there! I was reminded of something really important, and I wanted to share it with you! Hear my reflections in the short video below, and read more about...
Getting a good seat in your baby carrier - Quick Tip
Sometimes it's easier to show than tell! Watch Mama & Roo's babywearing educator Amanda adjust her baby in the seat of her LennyLight. Notice how she: -Holds the waistband...
Nursing in a soft structured baby carrier - Quick Tip
Sometimes it's easier to show than tell! Watch Mama & Roo's babywearing educator Amanda adjust her baby in the seat of her LennyLight for nursing. To nurse your baby...
What is GSM? Why weight is only one piece of the babywearing puzzle
At Mama & Roo's, we often have customers contact us concerned about choosing a "lightweight" baby carrier. And it's understandable - we're based in the US, and a LOT of...
Quick Review - the ABCs of Babywearing Safety
A quick guide from the babywearing educators at Mama & Roo's about babywearing safety! Read more below the video =). A is for Airway - make sure...
HOW TO ADD TO YOUR BABYLIST UNIVERSAL REGISTRY
Congratulations! Expecting a new baby is an exciting time. Did you know that you can use a universal registry like Babylist to add products from any store? That includes Mama...
What are Wrap Conversions?
Wrap conversion baby carriers are something special. But why? What are wrap conversions? And what makes them so great? Wrap conversions start out as long woven baby wraps. That...
How to: Suck Pads and Reach Straps for Your Baby Carrier
A mother wears her child in a baby backpack carrier in design Airglow with matching Airglow suck pads. Join Mama & Roo's babywearing educator and customer service rep Jessi...
How to breastfeed while baby wearing
Breastfeeding is a whole other world! You've just met your new baby, and now you've got more skills to learn. Maybe nursing comes easily to you and your baby. Or,...
All about: Wearing your Newborn
I wore my son in a carrier for the first time when he was 7 days old. My husband had his first RCIA meeting, and I was his sponsor. When...
Let's Talk Fiber! Quality, weaves, and more
Love looking at wraps, but have no idea why some colors are more expensive than other? What difference does a weave make? Is one fabric better than another for xyz...
3 Ways to Get Baby on Your Back in a Long Woven Wrap
One of the most common questions we get asked is, "How do I carry my baby on my back?" Mama & Roo's Founder Alexandra demonstrates a crossed arm method to...
Reviews
I love my lenny light! The color is gorgeous and the carrier is so comfortable. Mama and roo was great too!
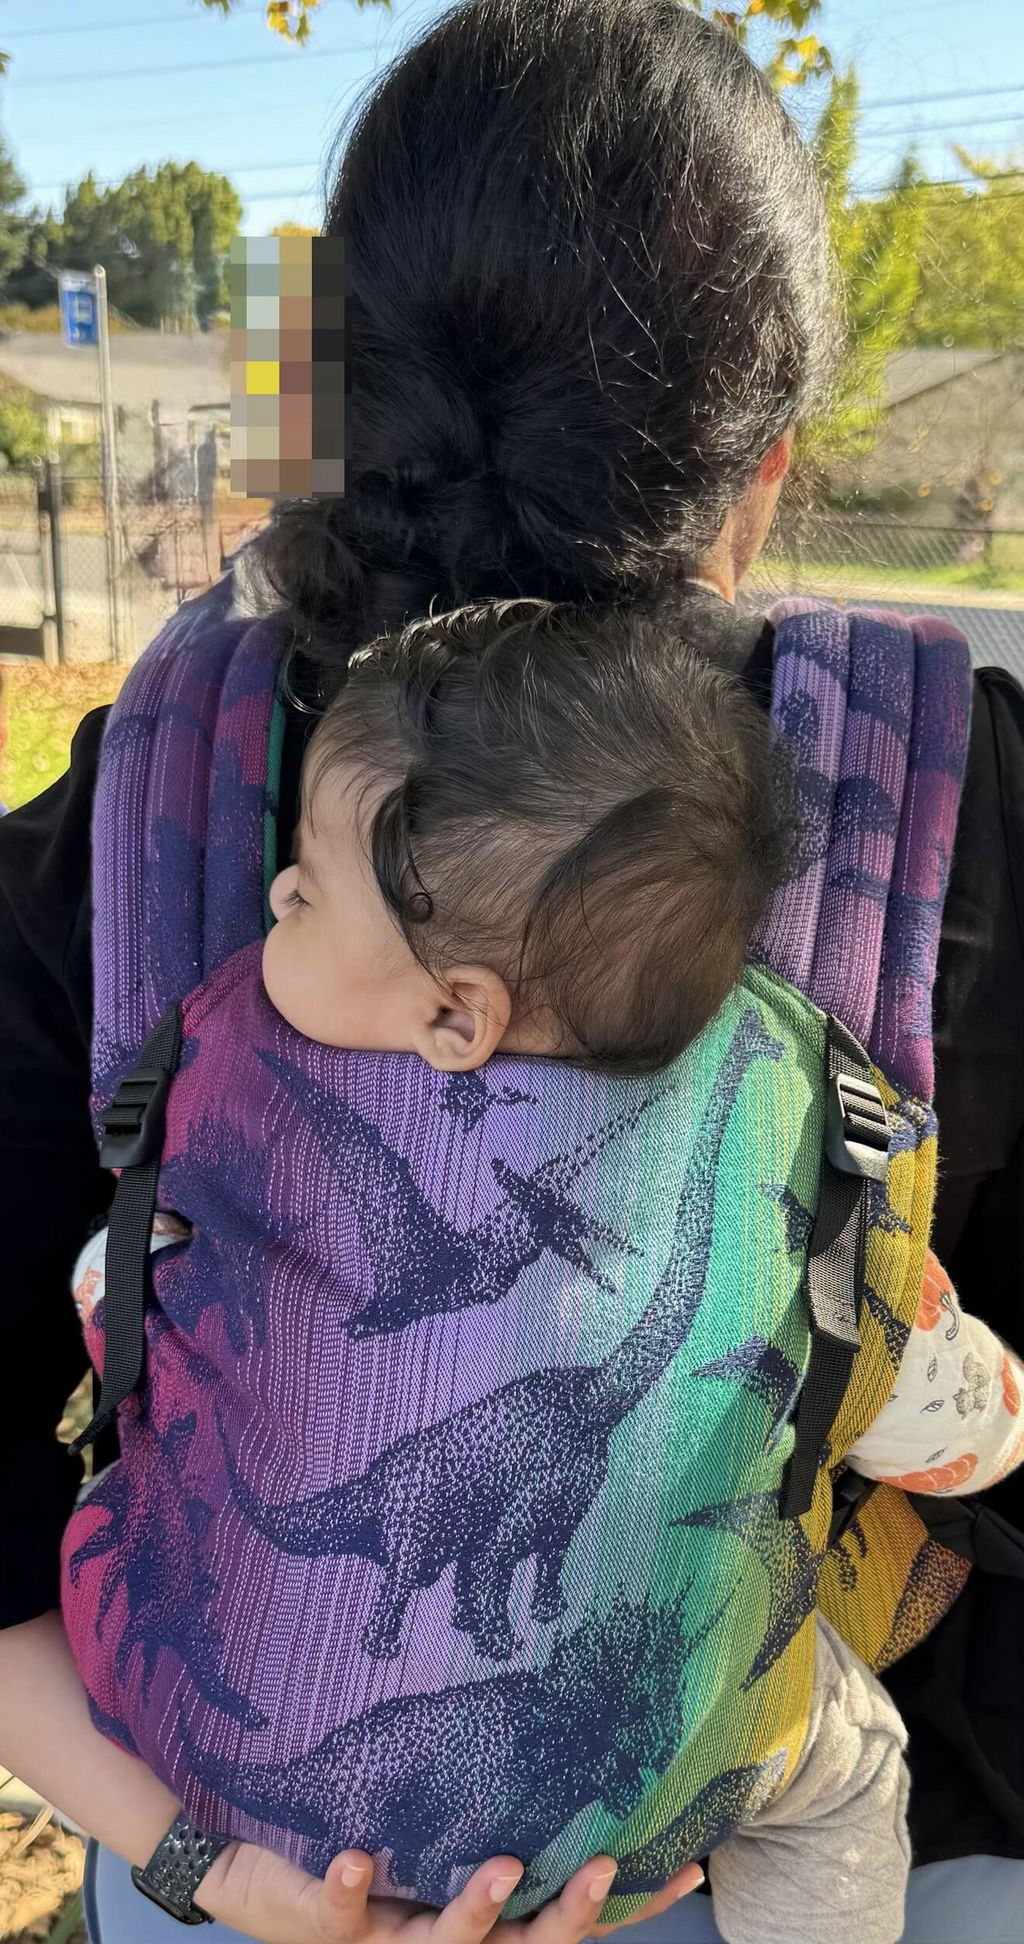
I love my LennyLamb Light! While I love my woven wrap, I find that it is more challenging to put on and take off quickly, especially without a mirror or support person. I can easily put my sleeping 2-month-old in the LennyLamb Light without the support of another person or a mirror. My baby loves that he can easily change the direction of his head. I love that it is comfortable, well-constructed, and beautiful. I can easily see that his airways are clear, and it's nice to not have to worry about his head being at a weird angle. It is great for cooking, chores, and taking walks.
This has been my first carrier so I might be biased; but it has been totally worth it. I have started baby wearing once the baby completed 3 months so it was new for both of us & have used almost daily for the past 3 months. The learning curve was not much, the carrier is soft woven, pattern was as in the picture, shoulder straps are very comfortable for both front and back carry. Waist belt has much give working for my postpartum body.
I'm a 3rd time mom. I have a few high end carriers (Sakura Blooms, Baby Bjorn) that are all around the $200+ amount. This carrier is the only one that feels luxurious and hits all the right details! I'm so glad my friend recommended this to me. I love how you can cross the straps in the back for added comfort, the padding is thick but not bulky, the carrier fits into its own bag, and the softness of the cotton/viscose is unmatched! It IS alittle warm for my very hot summer weather (90+ degrees), but because it's so easy to take on and off, I still find myself picking this carrier over my other ones!
Originally, I got the infant carrier for my 2 month old. I am still figuring out the adjustments for him. We realized that the carrier can hold our toddler too. Our toddler loves the carrier. It is a win for us.